Tracking wild creatures across varied ground helps researchers and hobbyists spot, record, and interpret signs. This short guide explains how different substrates preserve marks and what to look for when surveying an area.
Tracks show best in mud, soft garden ground, sand, and fresh snow. Dunes, creek bottoms, pastures, and game trails also yield clear prints.
Timing matters: shadows at certain times of day make pads and claw marks easier to see. Look for scat near a line of prints to confirm presence.
Measure width and length of a print in inches and note the way the foot lands — back or front — to tell deer from rabbits or a dog. A field guide helps, and carrying a hand-held map or GPS keeps the party safe while tracking wildlife.
Preparing for Your Tracking Expedition
A clear plan and a notified contact are the first steps for a safe tracking outing. Before leaving, they should pack a map or a GPS device to navigate likely wildlife areas and well-used trails.
Safety matters: tell a friend or family member the planned route and estimated return time. This simple step reduces risk and speeds rescue if the party gets lost.
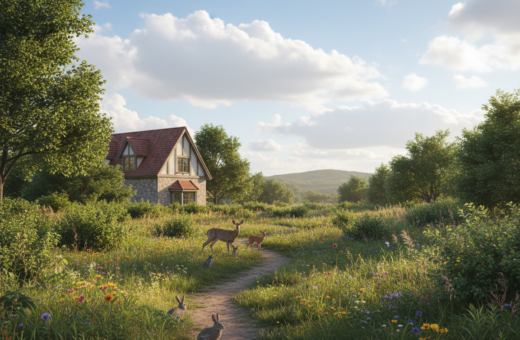
Search edges where two habitats meet. Those spots often hold the most diverse signs and more visible tracks. Keep a small notebook and measure any prints in inches for later ID.
Expect confusion from a domestic dog or other common animals on busy trails. Tracks are rarely perfect, so they must use judgment when interpreting partial marks.
- Carry navigation tools and water;
- Watch surroundings and stay on established routes;
- Record measurements and brief notes for surveys.
Essential Tools for Finding Animal Footprints in Soil
A few simple tools change how well one reads marks on the ground. Proper gear helps spot, measure, and preserve traces with less guesswork.
Selecting the Right Substrate
Soft surfaces hold shape best. Mud and fresh snow capture clear prints and limb placement. They show toe, pad, and claw details that dry ground often misses.
Near water, watch for slippery mud that can smear a print. In winter, snow records both back and front feet well. Choose areas where impressions are deep and undisturbed.
Timing Your Search
Track early or late when low light casts shadows across a print. That shading makes depth and edges easier to read.
Check scat for moisture. If it is still damp, the track may be recent. If it is dry all the way through, the marks are likely older.
“Carry a small ruler and note front and hind impressions; inches matter when separating a dog from a wild species.”
- Pack a ruler to record size in inches.
- Always look for front and hind feet impressions to read gait.
- Be patient and scan the area in a slow circle to recover a lost trail.
For a practical field reference, consult an animal tracks guide before heading out.
Interpreting Walking Patterns and Gaits
How an animal places its feet shows whether it walked, hopped, or bounded. Observers use gait to tell species apart and to infer intent.
Perfect walkers, such as deer and coyotes, often place the rear paw where the front paw landed. This pattern tightens the line of travel and conserves energy.
Coyotes usually move in a straight line, while a domestic dog will often zig and wander. That difference helps distinguish a wild canid from a pet on a trail.
Rabbits are hoppers. Their back feet land ahead of the front feet, producing a Y-shaped print that serves as a clear example of a bounder.
“Every species has a signature gait; reading it narrows the list of suspects.”
- Check front and hind feet positions to classify waddlers, bounders, or perfect walkers.
- If the trail breaks, scan the surrounding area in a slow circle to find where the prints continue.
- Observe the line and spacing to decide if the animal moved with purpose or just meandered through the area.
Analyzing Track Characteristics and Details
Examining depth, width, and claw evidence helps build a clear picture of who passed by. Careful notes and simple measures turn a single print into useful data for identification.
Measuring Width and Length
Measure each print in inches and record width and length. These two numbers narrow the list of likely species quickly.
Example: a wolf track often measures about four inches long and wide, which separates it from smaller canids.
Evaluating Depth and Pressure
Depth reveals weight and force. A deep mark in mud or snow usually signals a heavier creature or one that pushed off hard at that time.
- Compare depth across prints to estimate movement effort.
- Note whether rear prints cut into front marks; that shows weight shift.
- Record substrate type with each depth reading.
Identifying Claw Marks
Check for claw marks at the toe edges. Dogs commonly show claws; felines often do not because they retract them.
Also inspect pads: feline pads can be three-lobed, while a dog or similar track shows a concave heel. These pad shapes help confirm size and species.
“By recording width, length, depth, and pads, observers create a reliable record of local wildlife.”
Identifying Canine and Feline Prints
A close look at toe arrangement and heel pads reveals whether a track belongs to a doglike or catlike species.
Canine tracks are typically oval with four toes and a concave heel pad. The pad often lets one draw an “X” through the print when viewed from above.
Feline prints are rounder and often as wide as they are long. They usually lack visible claw marks because cats retract claws when they step.
“Compare front and hind sizes: a canine’s front feet often measure larger than the hind feet.”
- Raccoons leave prints that resemble small hands and show up near water or muddy spots.
- In snow, follow the line of travel to check gait and nervousness: straight-line movement hints at a wild predator; meanders suggest a pet.
- Measure key prints in inches to separate similar sizes and confirm whether claws are blunt or sharp.
Distinguishing Hoof Tracks and Ungulate Signs
Hoof impressions vary enough that size and shape point quickly to species. Observers should note shape, length, and context to tell deer from larger ungulates. Measure each print in inches and record the line of travel for a reliable ID.
Key differences matter: deer tracks are heart-shaped and usually 2 to 3.5 inches long. Elk leave rounder prints that measure about 3 to 5 inches.
- Deer: heart-shaped, 2–3.5 inches.
- Elk: rounder, 3–5 inches.
- Bison: very large, 4.5–6 inches and wide.
- Hooves show two toes; mud near water may capture dew claw impressions.
“By measuring length and noting shape, trackers reduce confusion with cattle or a dog.”
For a quick field reference, consult a detailed tracks guide before heading out.
Recognizing Small Mammal and Rodent Trails
Tiny tracks reveal species and behavior when observers slow down and study the scene.
Raccoons leave prints that often look like a small human hand, with five toes clearly set. These marks appear near water or dense brush and can show claw detail on soft patches.
Rodents such as mice and squirrels are hoppers. Their back feet land ahead of the front feet, producing clustered prints that reveal a bounding pattern.
Look for a tail drag in snow or mud; mice commonly leave it. Porcupine trails sometimes show rough pads and a slow, straight line.
- Rabbit trails form a clear “Y” shape as hind feet land ahead of the front.
- Measure a small print in inches to judge size and speed.
- Note spacing to tell if the creature moved slowly or hurried past.
“Small mammal signs often cluster near cover, so scan edges and low brush carefully.”
Methods for Preserving Wildlife Track Casts
A reliable cast captures details that photographs often miss. Before starting, clear sticks and debris around the print and confirm the ground will hold the material without collapsing.
Creating Negative Molds
Negative molds record the exact impression. Mix plaster of Paris with water to a smooth, pourable consistency. Pour the blend slowly into the print, letting it settle without stirring.
When working during winter, add packed snow to the mix to keep the mass cool and prevent the impression from melting too fast. Allow about ten minutes for the plaster to set; do not lift the cast before it hardens.
Casting Positive Replicas
To make a positive replica, grease the cured negative and pour a fresh layer of plaster over it. This duplicates toes, pads, and small pad marks, creating a durable record for study and display.
“Cast both front and hind feet when visible; the pair tells a clearer story of gait and direction.”
- Check ground firmness near water before pouring.
- Record measurements in inches and note whether prints are front or hind.
- Treat each cast as a time-stamped sample for later comparison.
Conclusion
Learning to read the traces left on trails rewards patience and attention. This closing note wraps the basic lessons of the guide and urges steady practice.
Mastery takes time. Observe regularly, record measurements in inches, and check for claw marks. Those small details help turn vague signs into clear IDs.
Always put safety first: carry a map and tell someone the route before heading out. Practicing these methods builds confidence and deepens understanding of local wildlife.
Remember, every set of tracks tells a short story. With care and patience, people will learn more about the animals that share the landscape.