Dave Nevue has spent over 50 years as a professional artist capturing the spirit of nature. He stresses that a well-chosen frame becomes part of the artwork’s story and lifts the composition in subtle ways.
A good frame guides the viewer’s eye to the subject and preserves fine details like fur texture. For example, a collector mounted the “Unspoken Bond” print of a Highland cow and her calf in a reclaimed wood frame with a walnut finish to deepen the scene’s intimacy.
These small adjustments create a sense of space that strengthens the emotional link between the animal and the room. Over time, quality frames also protect the image so it stays vibrant.
Below, readers will find practical tips that transform outdoor images into professional displays. The guidance keeps the subject central while honoring the natural mood of the scene.
Key takeaways: Choose a frame that supports the subject, use warm tones to add intimacy, and protect images for long-term display.
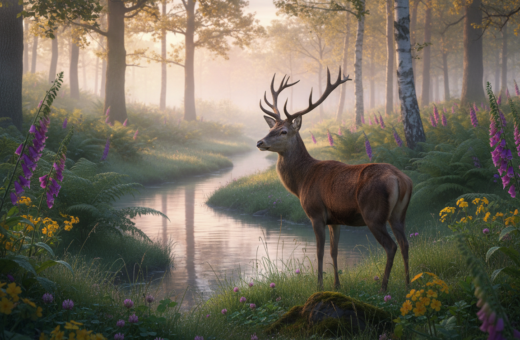
Mastering Wildlife Photo Framing Techniques
Perspective reshapes the relationship between subject and surroundings in every image.
The importance of perspective
By changing the camera’s point of view, the viewer’s eye locks onto the subject with less distraction.
Use the rule of thirds to place the animal off-center and to add natural space for movement.
Creating depth of field
A telephoto lens compresses planes and produces a soft background blur that keeps the focus on the main subject.
Shoot through trees or foreground elements to build layered depth and guide attention into the scene.
“A single moment in the wild gains power when perspective and light reveal the story.”
- Adjust point of view so backgrounds do not compete with the subject.
- Balance light and shadow to highlight details and mood.
- Choose a frame that echoes the environment—Dave Nevue used a deep espresso frame for his “Majestic Bison” example to match the rugged prairie.
Utilizing Natural Elements for Composition
Natural edges often act like a built-in window that leads the eye to the main subject. Overhanging branches, tall grass, and trunks give a scene instant depth. They create a clear foreground that makes the subject stand out.
When the photographer uses the rule of thirds, the animal sits in a spot that suggests movement and tells a stronger story. A shallow depth field then separates the subject from the background, keeping the viewer’s attention on fine details.
The collector’s “Almost There” print shows how a soft sage mat and light oak frame can enhance a natural scene. Shooting through trees adds layered depth and makes images feel immersive and professional.
- Look for natural borders in the environment that echo the subject’s habitat.
- Experiment with perspective to capture authentic behavior and focus.
- Use light and foreground elements to build space and guide the eye.
Selecting the Right Frame for Your Subject
The right surround can change how a viewer connects with the subject at first glance. A frame is the final design choice that completes the composition and clarifies the story the image tells.
Matching Mood to Material
Material, color, and texture should reflect the scene and the animal’s character. For example, Dave Nevue recommends a soft ivory mat with a moss green inner mat for his “Faith – The Curious Fawn” pastel painting.
Practical tips:
- Match heavy, dark frames to powerful subjects to convey strength.
- Use warm wood for woodland scenes to add comfort and space to the composition.
- Choose neutral mats to push the viewer’s eye toward the subject and away from a busy background.
Well-chosen frames draw attention to the focus and keep the viewer engaged. Each image benefits when the frame acts like a final brushstroke that completes the scene.
The Role of Matting in Visual Depth
Matting creates a deliberate pause between the image and its surround, giving the subject room and adding instant depth.
A good mat prevents the print from touching glass, which protects the piece and improves longevity. For collectors who display “Buttons and Buttercup” or “Charlie the Chickadee,” a reclaimed barnwood frame works well with a neutral mat to add texture and authenticity.
When chosen with care, the mat draws the viewer’s eye to the subject and away from a busy background. This simple buffer improves composition and helps the animal stand out as the focal point.
- Matting provides breathing space that lifts the image from the frame.
- It focuses attention so details in wildlife and wildlife photography prints read clearly.
- Professional framing often pairs mats with quality frames for a gallery finish.
“A well-chosen mat is the quiet frame that lets the story of the image speak.”
Choosing Between Wood, Metal, and Acrylic
Different frame materials change the way light, texture, and color play around an image. Choosing wood, metal, or acrylic shapes how the subject reads and how the scene fits the room.
Benefits of Natural Wood
Natural wood adds warmth and an organic connection to nature. It suits prints like “Charlie the Chickadee” by echoing the environment and giving the composition gentle space.
Wood ages gracefully and protects the print over time. It works well with neutral mats to keep the viewer’s eye on the subject.
Modern Metal Aesthetics
Metal frames offer a sleek, contemporary edge. They pair nicely with high-contrast images, such as the “Grace in the Glow” flamingo print, where a black frame intensifies soft feathers against a dark background.
Choose metal when you want a clean line that highlights composition and light without adding visual weight.
Acrylic for Gallery Displays
Acrylic delivers a near-frameless look that emphasizes the image itself. Galleries favor it because it creates a crisp, modern presentation and keeps backgrounds unobtrusive.
Consider longevity and the room’s environment when selecting acrylic. The right material enhances the story and draws the viewer’s eye to the animal and its space.
- Match material to subject and hanging environment.
- Think about how each option holds up over time and complements backgrounds.
- Use the best frame choices to make the image the focal point and protect the print for years: best frame choices.
Protecting Your Prints with Proper Glazing
Good glazing shields the subject from light and moisture so colors remain true over time.
Proper glazing is essential to protect wildlife prints from UV rays, moisture, and glare. These factors can fade an image and rob it of depth over time.
For art larger than 16×20 inches, Dave Nevue recommends UV-protective acrylic. He also suggests acrylic for pieces that hang in sunlit rooms.
A quality frame with UV protection gives the print the space it needs from glass and helps preserve delicate tones. The right cover keeps the animal’s colors vivid and the background from washing out.
- Use UV-blocking acrylic for large work or sunny walls.
- Choose glazing that minimizes glare in bright rooms.
- Invest in professional framing to ensure long-term protection.
“Proper glazing is a crucial step in the framing process, ensuring that images remain a focal point for years.”
Determining Ideal Sizes and Proportions
A well-sized piece balances the room and gives the subject room to tell its story.
Start by measuring the wall and the viewing distance. For most rooms, hang artwork so the center sits about 57–60 inches from the floor. This puts the image at a comfortable point for viewers.
Consider the subject’s proportions when choosing a frame. A 16×20 frame with a 2-inch mat, like the “Hang Tight” bear cub print, creates a floating effect and adds presence to the space.
Apply the rule of thirds and keep proper perspective so the composition feels balanced. Give the subject breathing room: neutral mat widths and margin around the image improve the sense of depth.
When selecting larger frames, aim to match the room’s scale. Bigger frames create space and elevate the piece to a statement print without overwhelming the background.
- Hang at eye level (57–60 inches) for best viewing.
- Use matting and proportion to enhance the subject and composition.
- Let scale add depth and support the story the image conveys.
Conclusion
In short, small border choices shape how the subject reads and how the room receives the piece. A well-chosen frame gives an image the calm space it needs and makes the subject feel present.
Good materials and careful glazing protect the print and honor the mood of the wildlife scene. Thoughtful framing keeps details clear and helps the viewer connect with the subject over time.
When collectors match material, scale, and style, the final choice creates lasting value. Let personal taste and the scene’s tone guide the decision so the artwork finds the right space in the home.