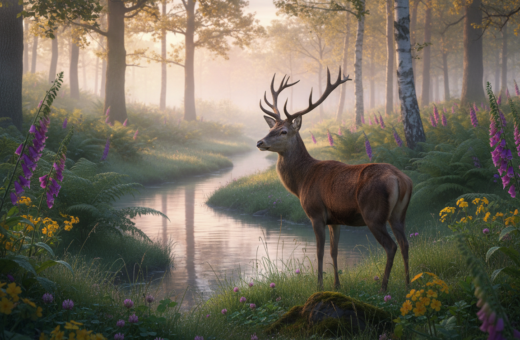
Carol Leather spent a damp May morning at Fowlmere reserve and learned how patient waiting can pay off when the scene is dim. She stayed in a hide and relied on thoughtful camera settings to catch a fallow deer in natural light.
Using an aperture of f/9 and an ISO of 12800, Carol proved that smart choices can yield an honest, even magical image. She balanced lens and shutter choices, and when shutter speed slowed she steadied the body by leaning on a surface to keep the subject sharp.
The key is learning how to match settings to the field conditions. With the right camera and steady technique, a photographer can turn a wasted morning into a memorable shot.
Mastering Low Light Wildlife Photography
Periods of fading sun push a wildlife photographer to rely on patience and method.
Most animals are most active at dawn or dusk, which often forces photographers to push their gear. In these hours, the right balance of aperture, shutter, and ISO matters more than rushy repositioning.
Practical tips for better shots in dim conditions:
- Stay put: waiting in one spot increases chances of natural encounters and honest photos.
- Know your camera: understand how aperture and shutter speed interact with a chosen lens.
- Steady support: leaning or using a rest preserves sharpness when speed drops.
- Accept imperfect images: mood can outshine technical flaws and tell a stronger story.
Carol Leather found that patience and tuned settings turned a gloomy morning into a memorable image. With practice, photographers in the field learn to capture more usable nature shots, regardless of the conditions.
Understanding the Exposure Triangle
A clear grasp of the exposure triangle lets photographers make smart choices when available light falls away.
Aperture Basics
The aperture controls how much light the lens admits and it also shapes depth of field. A wider aperture gathers more light, which helps when shooting animals at dawn or dusk.
Keep in mind: a shallow depth of field isolates the subject, while a smaller aperture increases sharpness across the frame.
Shutter Speed Dynamics
Shutter speed sets how long the sensor records the scene. Faster speeds freeze motion; slower speeds capture more detail but risk blur.
- Use something like 1/400s for a 400mm lens to reduce handshake in good conditions.
- In lower conditions, trade aperture or ISO before dropping shutter too far.
- A bit of practice with different shutter speeds helps produce better images of animals and nature.
Fact: understanding how aperture, shutter and ISO interact is the single best move photographers can make to improve photos in the field.
Optimizing Aperture and Shutter Speed
Choosing the right aperture and shutter pairing defines whether a fast-moving animal is frozen or a scene gains mood.
When using a telephoto lens, aim for the widest aperture your glass permits. That lets the camera gather as much light as possible and keeps shutter speeds higher to freeze action.
For example, a bear photo shot at 1/30s, f/4, and ISO 8000 demonstrates that slow shutter speeds can still work when the camera is stable.
Using a tripod eliminates shake, which is one of the most common things that ruins a photo. It also lets the shooter use slower speeds without losing sharpness.
“A steady camera widens creative choice: keep speed for movement, or slow it to build atmosphere.”
- Check lens specs: variable aperture models lose light as you zoom.
- If shutter speeds fall too far, try panning to keep the subject sharp while blurring the background.
- When possible, keep shutter speed fast to freeze animals; use tripod support for intentional slow speeds.
In short: prioritize the widest aperture on telephoto gear, steady the camera with a tripod, and balance shutter speed to suit motion in the scene.
Managing ISO Sensitivity and Digital Noise
High ISO settings often get a bad rap, yet they can save a moment that would otherwise be lost.
Debunking myths starts with facts: a noisy image is almost always preferable to a blurred one when photographing wildlife or animals in fading light.
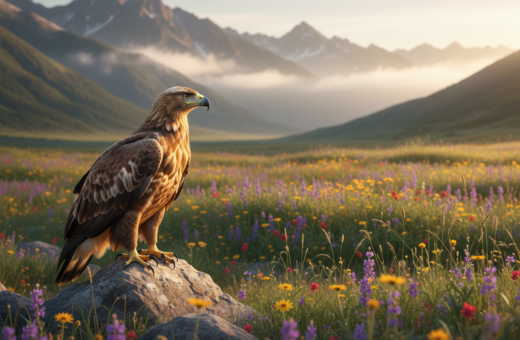
Real-world example: an eagle was captured at 1/100s, f/4, ISO 5000 on a Nikon D4. The result showed that modern camera sensors handle high sensitivity far better than many expect.
- Expose correctly in-camera; underexposed files amplify noise when brightened.
- Push ISO when needed to retain shutter speed and freeze action.
- Use noise-reduction software only after you capture a well-exposed image.
“A bit of noise is a small price to pay for a sharp, memorable shot.”
Understanding how your camera handles ISO is a vital tip for photographers working in the field. Embrace the settings that let you get the images that matter.
Leveraging Burst Mode for Sharpness
When shutter speeds slip, firing a series of shots increases the odds of a sharp result.
Burst mode is a simple, powerful tactic for getting usable images when conditions make single frames risky. Rapid firing raises the chance that one frame will catch a still subject or a moment of perfect focus.
On a tripod, burst mode captures subtle animal movement without adding camera shake. Off a tripod, it compensates for the occasional missed beat of the shutter speed and human reflex.
- Fire short bursts to limit file overload but increase hit rate.
- Use bursts when the subject pauses — one frame is often tack-sharp.
- Prioritize sharpness over minimal noise; a grainy photo beats a blurry one.
“Take a series, then choose the best frame; the camera gives you options the eye misses.”
For more technique and practice, consider an advanced wildlife photography course that covers burst settings, autofocus choices, and lens selection.
Strategic Use of Zoom Lenses
Zooming changes more than composition; it often alters the amount of light that reaches the sensor. A thoughtful approach helps photographers keep exposure and sharpness in balance when conditions shift.
Variable Aperture Challenges
Variable aperture zooms lose light as you zoom in. That drop forces a trade-off between reach and usable shutter speed.
Tip: when the available light dims, zoom out to the widest aperture to gain stop and allow a faster shutter speed.
Every change in focal length should prompt a quick aperture check. Doing so prevents unexpected underexposure and keeps the subject sharp.
Environmental Composition
When a close portrait is impossible, compose to include more of the scene. An environmental shot gives context and often feels more atmospheric.
Zooming out can also sharpen results because it lets the camera use a faster shutter. This is something like a practical compromise that improves overall image quality in the field.
- Zoom out for the widest aperture when speed matters.
- Recompose to add nature and habitat around the subject.
- Check aperture after each zoom and adjust ISO or shutter if needed.
“Strategic use of your zoom lens is one of the best tips for maintaining image quality when equipment limits the shot.”
Utilizing the Histogram for Perfect Exposure
A quick glance at the histogram can save a shot before you even press the shutter. The graph shows how much of the scene falls into shadows, midtones, and highlights, so the photographer can avoid hidden underexposure.
Push the histogram to the right when needed. Doing so captures the maximum amount of information on the sensor and improves final image quality. For example, a coastal brown bear was captured at ISO 20,000 using this approach to retain detail in a very dark scene.
That technique reduces the risk of digital noise that comes from brightening an underexposed file in post. A well-exposed shot at high ISO often produces a better result than a dark file boosted later.
- The histogram reveals how shutter speed and aperture affect exposure in real time.
- Practice reading the graph to set exposure without guesswork.
- A bit of routine work with the histogram raises overall shot quality in varied conditions.
“Use the histogram to expose for data, not habit.”
Conclusion
Mastering camera choices takes steady practice and an eye for timing. A clear routine helps when light shifts and conditions change. Small habits make big differences over time.
Patience, paired with sensible settings, wins more frames than haste. Use the right shutter speed and understand how the shutter and ISO work together when photographing wildlife in dim scenes.
Apply these tips to improve composition and exposure. Skilled photographers find that deliberate practice yields better wildlife photos and more rewarding results.
Every wildlife photographer will face imperfect moments, but with steady work and confidence, they can capture the magic of a scene even when conditions are challenging.