Understanding natural light wildlife photography gives a photographer clear advantages when shooting animals outdoors. It teaches how the sun and shade shape texture, tone, and true color.
When they learn to read and control available light, images gain depth and accurate hues. Managing direction, quality, and color of light helps an image reach professional clarity.
Every skilled pro knows that properly handled light is the main factor in image quality. This short guide offers the basic skills needed to make outdoor images sharper and truer in color.
With practice and attention to detail, a photographer can turn ordinary shots into standout portraits that reflect the subject’s real tones and texture. Consistent work with these methods improves sharpness, color depth, and overall impact.
The Importance of Research and Planning
A great image often begins with hours spent studying where animals live and move. Planning reduces surprises and makes the field session efficient. Good prep gives the photographer a clear goal before arrival.
Species Habitats
Study habitat first. Knowing where animals feed, rest, and hide helps photographers set up the best angle and distance.
For example, the Maasai Mara National Reserve in Kenya is a top spot to watch the Great Migration of wildebeest and zebras. Time spent learning that cycle pays off with stronger photos.
Migratory Patterns
Tracking migratory patterns lets a photographer predict movement and plan shoots around peak activity. Planning around breeding seasons also yields engaging images of youth and predator-prey behavior.
- Use trail cameras to monitor activity and find blinds.
- Research logistics, safety, and local guides before travel.
- Pre-visualize the final image by studying the subjects’ habits.
Pro tip: Treat research as part of the craft; careful study and respect for animals make most successful photos.
Selecting the Right Camera Gear for Wildlife
Good equipment helps a photographer track, focus, and freeze fast-moving subjects with confidence. Choosing a camera body and lenses is the first step toward consistent, high-quality image capture when shooting animals.
Mirrorless systems now lead for autofocus speed and electronic viewfinder tracking. A camera that can sustain at least 8 frames per second gives a photographer the burst needed to catch decisive moments.
A telephoto lens of 400mm or greater lets one keep a safe distance while filling the frame. Crop sensors (1.5x or 1.6x) extend reach, which is useful for skittish subjects.
- Prioritize a fast AF system to hold focus on erratic animals.
- Choose weather-sealed gear for dusty, wet, or hot locations.
- Invest in a versatile zoom to adapt between close and distant shots without changing lenses.
Reliability matters: a solid camera and lens combo reduces downtime and improves the odds of usable shots during long field sessions.
Understanding Natural Light Wildlife Photography
The way daylight sculpts texture and tone decides whether an animal portrait feels alive or flat.
Understanding natural light is the cornerstone of effective wildlife photography. It sets mood, color, and the level of detail in every image a photographer makes.
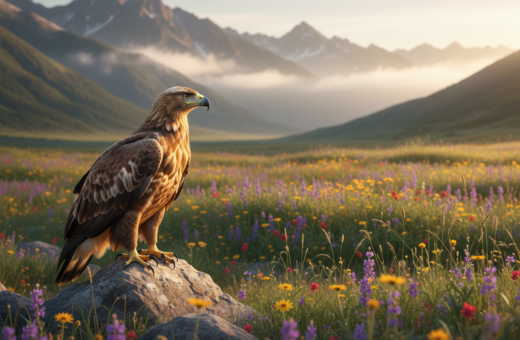
For example, the soft glow of golden hour gently enhances fur and feathers, making a subject appear more three-dimensional. A skilled shooter adapts across the day to keep image quality consistent.
Direction and intensity of illumination define the success of a shot in the field. Using the camera to balance foreground and background separates amateur work from professional results.
By observing how light falls on the subject, a photographer can adjust exposure, focus, and composition to tell a stronger story. Mastering this approach yields authentic, intimate images of animals in their nature.
- Watch the sky and plan time for the best angles.
- Adjust settings to keep texture and color true.
- Shoot with intent so every shot supports the story.
The Role of Color Temperature in Outdoor Images
Color temperature influences how a viewer reads tone and mood in any outdoor scene. The Kelvin scale runs roughly from 2,000 K for tungsten to 10,000 K in deep shade. Knowing where the light sits on that scale helps a photographer correct shifts and preserve true hues.
White Balance Settings
Adjusting white balance is the primary tool to remove color casts and keep images accurate. Many cameras offer presets and a Kelvin slider for fine control.
- Use the Kelvin scale to judge warm versus cool conditions.
- In low light the camera may misread color, so check results and tweak settings.
- A fast lens with a wide aperture lets more light in and supports a faster shutter speed to freeze motion.
- If photos look too cool, try the Shade white balance to warm the scene and enhance golden tones.
- Proper exposure matters: wrong exposure can make colors muddy and hard to fix later.
“A careful pro watches color temperature so the eyes of the subject stay sharp and true.”
Understanding the link between light temperature and camera settings is a basic but vital skill. It improves color accuracy, keeps the subject’s eyes vibrant, and makes every image feel faithful to the scene.
Mastering the Direction of Light
How the sun hits a subject can turn a flat frame into a memorable image. Choosing the direction of illumination is a conscious act that shapes mood, texture, and focus. A photographer changes angle, not fate, to craft stronger shots.
Front Lighting
Front lighting fills shadows and keeps the subject evenly lit. It often creates clear catchlights in the eyes and yields sharp detail across fur and feathers.
Use front illumination for documentary-style photos where accuracy matters. A faster shutter and steady lens help freeze subtle motion.
Backlighting
Backlighting can produce rim light that separates subject from scene. David Yarrow’s 45-degree sun placement is a strong example of this technique.
Expose for the sky to make silhouettes at sunset. For a halo effect, meter for the subject and let the background bloom.
Side Lighting
Side lighting creates dramatic contrast—chiaroscuro in the tradition of Caravaggio—and sculpts form with shadows.
Move around the subject to vary the angle and choose where shadows fall. Each change alters the frame and the story the image tells.
“Mastering direction is a choice; it changes mood, depth, and focus.”
- Tip: Practice at sunrise and sunset when the sun creates long, attractive shadows.
- Tip: If you want rim light, place the sun slightly behind and to one side of the subject.
- Further reading: See a deeper guide on controlling the sun and exposure here.
Utilizing Soft Light for Better Detail
Diffused sky tones help a lens capture fur and feather texture with greater fidelity.
Soft light is the secret to revealing fine detail. When clouds scatter the sun, shadows become gentle and textures show clearly.
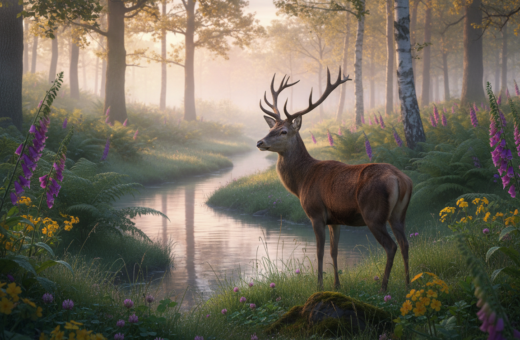
On an overcast day the sky works like a giant softbox. That lighting is ideal for close work with a telephoto lens. A photographer can record every whisker and feather without harsh contrast.
- Golden hour — sunrise sunset — also yields soft tones that flatter the subject.
- Because the sun sits 92 million miles away, the atmosphere must diffuse its beam to avoid hard shadows.
- With softer illumination a shooter can try new angles and keep shadows unobtrusive.
“Soft, even lighting brings out texture and renders colors truer to the scene.”
Managing Exposure in Challenging Conditions
Exposure control separates good field frames from great ones when conditions turn difficult. The shooter must read how the camera interprets the light reflected from the wildlife subject and react fast.
In bright sun watch highlights closely. Animals with white fur or feathers clip fast, so protect detail with conservative exposure. A fast shutter speed helps freeze motion and avoid blur.
When light shifts during a dramatic sunrise sunset, switch to manual exposure to keep full control. Open the aperture wide in low light to let the lens gather more photons while keeping ISO reasonable.
Learn to read the histogram on the camera. It shows whether shadows or highlights are lost and guides quick tweaks to settings.
- Tip: Practice changing shutter, aperture, and ISO without taking your eye off the subject.
- Tip: Pre-set two exposure modes for bright and dim scenes to swap fast.
- Tip: Bracket exposures when unsure to protect the final image.
“Mastering exposure in harsh conditions keeps photos sharp, detailed, and true to the scene.”
Techniques for Shooting in Low Light
Dim conditions test gear and patience; success depends on solid technique and steady hands.
When the evening falls, boost ISO to keep a usable shutter speed. Many pros accept values up to ISO 12800 to save the shot. This may add visible grain, but it preserves the subject’s eyes and motion.
A fast prime lens with a wide aperture gathers more photons and makes cleaner images at low settings. Prioritize shutter speed to avoid blur; choose a balance between noise and sharpness that fits the scene.
Patience is essential. Waiting for a subject to pause in better position often beats frantic chasing. Even grainy photos can carry powerful mood and tell a stronger story.
- Test your camera for noise performance at high ISO before a trip.
- Use a steady tripod or monopod when slow shutter speeds are unavoidable.
- Focus on the eyes—they sell the image even if other detail softens.
- Practice these techniques to turn difficult conditions into compelling shots.
“The goal is to capture the moment; sometimes grain is part of the story.”
Capturing Action with Fast Shutter Speeds
Action shots come to life when the photographer locks in a shutter speed that outpaces motion. Freezing animals in motion preserves detail and keeps the final image clean. The camera must sustain a high shutter to follow a moving subject across the field.
A wide aperture often makes that shutter possible in dimmer conditions. A faster lens and steady technique let one favor shutter over ISO when the scene demands it.
Autofocus speed on the lens is as crucial as shutter speed. Both must work together so the subject stays sharp while it moves through the frame.
- Prioritize shutter: set a high shutter to avoid motion blur when animals sprint or take flight.
- Balance aperture and ISO: open the lens to allow faster shutter while keeping noise manageable.
- Practice timing: learn the subject’s peak movement to press the shutter at the right time.
“Good action work is the result of precise timing, reliable gear, and steady hands.”
With practice, the photographer will blend camera settings, lens speed, and technique to make every action frame tell a clear story in modern photography.
The Impact of Aperture on Background Quality
Aperture choice directly shapes depth and the look of areas behind the subject.
A wide aperture creates a shallow depth of field and blurs the background. This makes the wildlife subject pop and removes busy distractions from the scene.
Using a telephoto lens with that wide aperture tightens the angle and simplifies background content. That combo is powerful for isolating the animal and emphasizing eyes, texture, and posture.
If a shooter wants more of the scene in focus they choose a smaller aperture. Be aware: a smaller opening demands a slower shutter speed or higher ISO, so exposure must be managed to keep the subject well-lit.
Practice with each lens to learn how much blur appears at different settings. A bit of trial and error shows when the background becomes supportive instead of distracting.
- Tip: Start wide for portraits, stop down for context shots.
- Tip: Balance aperture, shutter speed, and ISO to protect detail.
- Tip: Use angle and distance to fine-tune background separation.
“Mastering aperture lets the photographer guide the viewer’s eye and create more impactful images.”
Working with Different Weather Patterns
Weather reshapes every shoot; the sky and wind decide tone and mood long before the shutter fires. A photographer must stay adaptable because the light and shadows change with the conditions.
On a sunny day the sun can throw harsh shadows, but it also provides bold contrast for dramatic images. In those moments they may favor faster shutter speeds and careful metering to protect highlights.
When the sky is overcast, clouds act as a diffuser and deliver soft lighting that reveals fine detail in nature. This is ideal for close portraits and rich texture without blown highlights.
Bad weather often yields unique behavior; rain or snow can create rare, moody frames. A pro knows to move as the direction of the light shifts and to reposition to keep the best exposure.
- Be adaptable: change angle as shadows move.
- Use weather: turn rain into atmosphere, not a problem.
- Protect gear: shield cameras from moisture and dust.
“Embracing the elements opens new creative possibilities during sunrise sunset and every other time of day.”
Creative Composition and Framing
How a subject sits inside the frame defines the story an image will tell. Creative composition is more than centering; it guides the viewer and reveals behavior.
Use the rule of thirds as a basic guide. Placing the subject off-center creates balance and motion in a shot.
Consider the environment. Background elements add context about the animals and their habits. Framing with branches or rocks puts the subject into a believable setting.
- Leading lines: use trails, rivers, or light to draw the eye toward the subject.
- Natural frames: windows of foliage or rock can isolate and highlight the subject.
- Try new angles: low or high viewpoints change the mood and scale of the photo.
Example: a lone bird near a converging ridge reads as solitary; the same bird with others shows social behavior. Each composition choice teaches the viewer something about the subjects.
“The best images capture the essence of the subject while guiding attention with deliberate composition.”
Polishing Your Images in Post-Processing
The final edit brings out the detail the camera captured in the field.
Start by fixing exposure and color. Tweak white balance so the eyes and fur read true. Use local adjustments to balance bright and dark areas without flattening texture.
When shots were made in low light, apply noise reduction carefully. Modern tools preserve detail while cleaning grain.
- Maintain realism: enhance, don’t invent—keep the scene honest.
- Adjust settings: fine-tune contrast, highlights, and shadows for consistent tone.
- Sharpen selectively: focus on eyes and key features to guide the viewer.
- Save versions: keep an original file and export a polished image for sharing.
“Post-processing should reveal what the camera saw, not rewrite the moment.”
With the right techniques a good shot becomes a great image. Every photo deserves a bit of attention so the final work reflects the encounter and the skill behind the camera.
Conclusion
Small choices at dawn or dusk can lift an ordinary frame into something memorable. A photographer who practices the tips in this guide will learn to read the scene and choose the best angle each day.
Mastering these skills improves the chance of making striking wildlife photos. The secret often shows in the subject’s eyes, so keep focus there and stay patient.
At sunrise sunset or in a late sunset glow, new opportunities appear. Nick Dale stresses that patience and steady study define growth for any wildlife photographer.
Keep practicing, respect the subjects, and seek fresh angles. With dedication, work will inspire others and bring richer images of nature.