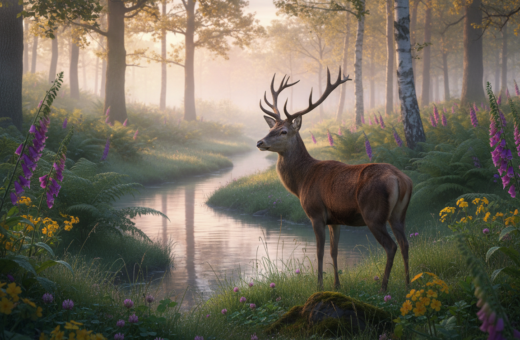
The ability to lock onto a fast-moving subject separates casual snaps from consistent, high-quality images. The Canon Bird Branch Project Lesson 11 shows that a 400mm focal length and precise autofocus choices matter when chasing a swift Barn Swallow.
A professional camera body paired with a long lens and fast shutter speed—often 1/2000 second—helps freeze motion. Many pros set ISO800 to keep exposure stable in changing light and to avoid camera shake when tracking moving subjects.
Mastering modes like One-Shot AF or AI Servo AF and the shutter button timing boosts the chance of a sharp frame. Whether shooting with DSLR or mirrorless cameras, understanding aperture, exposure, and focal length is the surest way to improve shots over years of practice.
In short: the right camera settings, the correct lens length, and confident tracking are the core points that raise success rates for small flying wildlife.
Understanding the Basics of Bird Photography Autofocus
Choosing the correct focus mode is the first step toward consistent, sharp images of fast-moving wildlife. Canon Lesson 11 defines three core modes: One-Shot AF, AI Servo AF, and AI Focus AF. Each has a clear purpose and affects how the camera reacts when a subject moves or pauses.
One-Shot AF for Stationary Subjects
One-Shot AF locks focus when the shutter button is held halfway. It is ideal when a bird is perched or when a photographer can predict a brief action.
Example: A Grey Heron paused above water—lock focus, recompose, then wait for the strike.
AI Servo AF for Dynamic Motion
AI Servo AF continuously updates focus to track moving subjects. It predicts motion so the camera keeps the subject sharp as it flies or rushes toward the lens.
Many cameras also let the photographer pick a single focus point. The center point is often the most accurate and can be used to secure initial focus before recomposing.
“Selecting the right AF mode is a foundational skill that raises overall success rates when shooting wildlife.”
- Use One-Shot for still targets and AI Servo for action.
- AI Focus AF can auto-switch when behavior is uncertain.
- Holding the shutter button halfway often keeps tracking active and reduces camera shake.
Selecting the Right Camera Body for Wildlife
Investing in a camera body with high frame rates and a large sensor changes how often a photographer captures decisive moments. Models like the Nikon Z8 (45.7MP, 20 fps) and the Sony a1 (50MP, 30 fps) offer the speed and resolution needed for small, fast subjects.
Full-frame sensors perform better in low light and reduce noise, so many pros prefer them for field work. Mirrorless systems add advantages, including advanced subject detection and faster continuous shooting.
- Sensor size: full-frame gives cleaner images at higher ISO.
- Frame rate: 20–30 fps raises the chance of the perfect frame.
- Subject detection: mirrorless cameras often track eyes and spots automatically.
Example: a 50MP camera lets a photographer crop tightly while keeping detail, increasing usable shots from a single burst.
Essential Lens Considerations for Small Subjects
Choosing the right lens and aperture can make or break close-up wildlife shots. For many shooters, a versatile zoom like the Tamron 150-600mm G2 provides reach without an extreme budget hit.
Finding the Optical Sweet Spot Range
Every lens has a sweet spot where sharpness peaks. Most perform best near f/7.1–f/8. Stopping down to that range yields crisper images and better edge detail.
Zooms lose clarity near their maximum length. Avoid the final 20–25% of the range when sharpness matters most.
Adding a 1.4x teleconverter gives extra reach but costs roughly one stop of light. That affects shutter speed and ISO choices, so adjust camera settings accordingly.
- Tip: Test a lens at several apertures to find its sweet spot.
- Prime f/2.8 glass is fast, but often far more expensive than zooms.
- Balance focal length and aperture to separate the subject from the background while keeping the eye sharp.
Mastering One-Shot AF for Stationary Birds
For perched subjects, One-Shot AF locks once the shutter button is half-pressed, letting the shooter recompose. This mode is ideal when the subject holds still and the photographer has time to set the frame.
The center focus point is usually the most sensitive. In low light the center point finds contrast faster, so use it to secure focus on the eye. After the lock, the camera will not hunt the background, so recomposing is safe.
Use a stable support such as a tripod or a beanbag to cut camera shake. That is especially important with long lens setups and slow shutter speeds. A steady platform keeps the focus spot sharp on the subject’s eye.
- Be patient: wait for the subject to pause before you press the button.
- Lock with the center point, then recompose for a stronger frame.
- Practice timing to capture peak expressions and pose.
- Stable support reduces blur when using heavy lenses at long length.
“Locking focus and then recomposing gives precise control over the final image.”
Utilizing AI Servo AF for Moving Subjects
When a subject darts across the frame, AI Servo AF maintains focus by predicting its path. This continuous mode updates the focus point in real time so the camera keeps up with erratic flight.
Continuous tracking is essential for capturing birds in motion. Modern motion-prediction algorithms anticipate where the subject will be a fraction of a second ahead. That reduces hunting and raises the success rate of sharp images.
Experienced shooters often keep the active focus point over the creature’s head or center mass. Doing so preserves the critical eye area as the subject changes direction. A wide-area AF mode can help when the sky provides no background detail.
Many pros pair AI Servo AF with back button focus to separate focus from the shutter. This method gives steady tracking while the shutter button only records the shot. It also helps manage shutter speed and aperture without accidentally dropping focus.
“AI Servo AF is the gold standard for in-flight work; practice and the right camera settings make it repeatable.”
- Tip: Maintain a high shutter speed to avoid motion blur and to let tracking algorithms perform.
- Keep lens length and ISO balanced so the camera can lock and follow reliably.
- Practice with different AF area options to find the one that matches the subject and light.
The Role of Back Button Focus in Bird Photography
When focus lives on a rear button, the photographer gains instant control over locking or tracking a subject. This simple change separates the focus routine from the shutter and reduces accidental refocusing during key moments.
Back button focus is a practical technique for shooting birds. By assigning focus to a thumb button, the shooter can hold continuous tracking while firing a burst of shots. That keeps the camera locked on the subject without the shutter interrupting the process.
Many pros who use bodies like the Nikon D850 praise this method for field reliability. It prevents the camera from hunting each time the shutter is pressed. The result is a higher hit rate and fewer wasted images.
Practice is needed. After a few weeks the method feels natural and greatly improves control when birds move through branches or light changes.
“Separating focus from the shutter gives the photographer decisive control in complex scenes.”
- Lock focus independently to recompose quickly.
- Toggle between tracking and single-point modes with one thumb.
- Maintain continuous focus during bursts to capture peak action.
Optimizing Subject Detection and Tracking
Today’s mirrorless cameras can lock onto an eye and follow it across cluttered scenes with remarkable consistency. This makes it easier to keep the subject sharp while composing the final image.
Modern subject detection reduces the need to move focus points manually. Models like the Sony a1 and a7R V lead the pack with near-perfect tracking of birds in flight.
Photographers should still confirm the camera is in the correct mode for the species and light. Firmware updates often improve tracking algorithms, so regular updates are important.
- Use eye-tracking to keep the eye in focus during high-speed flights.
- Pair detection with manual points when multiple subjects appear in frame.
- In dense scenes, the system can ignore branches and favor the target.
- Balance shutter speed and lens length so the camera can keep up.
“Leveraging subject detection lets the camera handle tracking while the shooter refines composition and timing.”
Combine automatic detection with practiced settings and back-button control to raise hit rates. That blend of tech and technique delivers more usable photos per session.
Managing Exposure Compensation for Bright Skies
Backlit scenes make the subject look darker unless exposure is adjusted deliberately. When the sky is much brighter than the subject, the camera meter favors highlights and underexposes the subject. Dialing in positive exposure compensation brings feather detail and eye sharpness back into view.
For white subjects, reduce exposure compensation to protect highlights. Highlight-weighted metering helps preserve bright areas while keeping the subject readable.
Many pros use Manual mode with Auto ISO to lock shutter and aperture and let the camera adjust sensitivity. A live histogram is invaluable to confirm no clipping in real time.
- Tip: Try +1 to +2 EV for a dark subject against sky; use −1 EV for bright, white subjects.
- Watch the histogram; aim for data away from the far right to save highlights.
- Combine manual settings with a stable shutter speed to keep focus and motion control consistent.
“Understanding meter behavior is the fastest way to improve high-contrast shots.”
For a repeatable field routine, review an exposure workflow and practice these adjustments until they become instinctive.
Implementing Pre-Release Capture for Take-Off Shots
Pre-release capture uses a short rolling buffer so the photographer can save frames from just before the shutter is fully pressed. This acts like a small time machine and makes it easier to catch a take-off that lasts only a fraction of a second.
Cameras such as the Nikon Z8 and Canon EOS R1 have made this mode common in modern gear. When the photographer half-presses the shutter button, the camera begins buffering frames. A full press then writes the buffered frames plus new ones to the card.
Note: some implementations currently save only JPEG files. Raw support is expected in future firmware updates, which will improve post-processing flexibility.
“Pre-release capture raises the hit rate for elusive launches and short bursts of action.”
To get the best results, the shooter should keep steady focus on the subject and test buffer lengths in the menu. Experiment with shutter speed and exposure settings so the buffered frames are usable. With practice, this feature significantly increases successful photos of take-off behavior.
- Tip: Use a high shutter speed and firm focus to preserve sharp frames.
- Adjust buffer length to capture enough pre-event frames.
- Confirm file type limits before relying on the mode in the field.
Fine-Tuning Shutter Speed for Different Species
Shutter choices must match the subject’s pace to freeze action or imply motion. This short guide helps the shooter pick sensible shutter speed settings for varied behavior.
Adjusting for Small and Erratic Birds
Small, erratic subjects need aggressive shutter speed. Many pros use 1/2000 second or faster to freeze wingbeats and twists.
The reciprocal rule is a practical baseline: set the shutter at least as fast as 1 over the focal length. Then raise speed further for quick movers.
Setting Speeds for Large Soaring Birds
Large, soaring subjects move more predictably. A slower shutter like 1/500 second often suffices. This keeps ISO lower and image quality higher.
Image stabilization helps when shooting handheld, but it should be disabled on a tripod or beanbag. Above all, study the species’ behavior and adjust the shutter and lens length to match the action.
“Err on the side of a faster shutter when in doubt; it increases usable photos and preserves detail.”
- Use the reciprocal rule as a starting point.
- Increase speed for small, fast targets; lower it for gliding subjects.
- Turn off stabilization when on stable supports.
- Watch behavior to anticipate when to change the settings or button control.
Techniques for Capturing the Perfect Slow Pan
Using a deliberately slow shutter can turn routine flight shots into dynamic, painterly images. A slow pan typically uses a shutter speed between 1/15 and 1/20 second to blur the background while keeping the subject sharp.
Success depends on smooth, consistent movement. A tripod or monopod with a panning head helps keep the motion horizontal and steady, especially with longer lens lengths.
In bright light, a variable ND filter is often essential to control exposure and allow the slow shutter without overexposing the frame. Set your mode and base settings so the camera maintains the chosen shutter speed while you track the subject.
- Practice steady tracking so the head or eye stays sharp in the center area of the frame.
- Use a moderate lens length and firm stance; move the camera in sync with the subject’s path.
- Expect a lower hit rate than frozen action, but the resulting photos are more artistic.
- Try the technique with larger species first—wing motion creates pleasing blur arcs.
- Adjust exposure and ND strength until the shot shows motion and retains enough detail.
“Mastering a slow pan takes practice, but it rewards the shooter with images that convey true motion and energy.”
Tip: start with short bursts and review results to refine timing and settings. Over time, steady technique and repetition raise the success of this creative shot.
Overcoming Focus Hunting with Manual Adjustments
When the AF system chases branches instead of the subject, reverting to manual control restores predictability.
Manual focus gives the photographer direct control when the camera struggles to lock. This matters in low contrast or cluttered scenes where the lens may hunt and miss the decisive shot.
Many lenses offer full-time manual focus, so the shooter can tweak the focus ring even while in AF mode. A focus limiter switch also helps by cutting the lens search range. That change speeds acquisition and reduces wasted attempts.
- Learn to flip to manual quickly when the camera cannot find the target.
- Use the focus limiter to prevent long searches across the entire focal range.
- Keep a thumb on the ring to make micro-adjustments during a fast shot.
- Practice in varied light so switching between AF and manual is instinctive.
Practice is the best ally. By rehearsing quick changes in settings and hand placement, the shooter improves reaction speed and raises the number of usable shots.
“A fast manual correction is often the difference between a lost moment and a keeper.”
For more on when to take over control, see when manual focus is better. Knowing how to switch and when to press shutter ensures the intended subject stays sharp across challenging scenes and varied camera settings.
Balancing Aperture and Focal Length for Sharpness
Choosing the right aperture-focal length pair is a practical route to sharper, more usable shots. Small adjustments—like moving from f/5.6 to f/8—often improve overall clarity and corner detail on many zoom lenses.
Long focal lengths give a shallow depth of field that isolates the subject and creates pleasing bokeh. That separation helps the eye stand out and makes the frame look cleaner.
Avoid the extreme ends of a zoom range. The final 20–25% of reach can soften images. Staying in the lens’s mid-range usually preserves contrast and sharpness.
Find the sweet spot by testing apertures and lengths in the field. Many non-professional zooms perform best when slightly stopped down.
“Stop down a touch and move off the extremes; optical gains often appear far quicker than buying new glass.”
- Test lenses at several apertures to learn their best range.
- Use longer focal lengths to isolate the subject but keep shutter speed high.
- Balance lens reach and aperture to maximize sharpness for each set of shots.
Conclusion
A clear plan and steady practice make technical settings translate into more usable shots.
Mastering tracking modes, choosing quality gear, and learning when to switch to manual control all raise the success rate in the field. Patience and repetition turn knowledge into habit.
Techniques such as back-button focus, pre-release capture, and thoughtful manual adjustments give shooters more control over each subject. Combine these with tested camera and lens choices to boost keeper rates.
Final advice: get out regularly, review results, and tweak settings. Over time, smart practice produces more consistent shots and clearer outcomes.